Easy experiments + pantry staples scientific exploration at home
The “oohs” and “aahs” that typically accompany fireworks are the sounds Kurt Boudonck wants to hear coming from local science classrooms.
Boudonck works as a research group leader at Bayer CropScience in Research Triangle Park and volunteers for the company’s Making Science Make Sense program, an initiative to advance science literacy across the nation through teacher education and public awareness, with an emphasis on fun.
“At the heart of Making Science Make Sense is a shift away from textbook learning to one that is more hands-on, inquiry based. … The textbook can be boring, but when you bring an experiment with a wow factor, the kid walks away with the feeling that science is fun. That’s what it’s all about,” said Boudonck.
Boudonck “caught the science bug” while working on his master’s thesis at a biotech company in Belgium. It was the first time he really experienced hands-on scientific work, he said. Ever since, he’s been passionate about science (he enthusiastically wakes up at 4:30 a.m. for his job at Bayer) and sharing the excitement of hands-on experimentation with young students.
“The best thing we can do with a program like Making Science Make Sense is start as early as we can in the schools with the kids to excite them about science, and to educate them on what science is all about,” said Boudonck. “STEM (Science, Technology, Engineering and Math) jobs are on the rise. The needs are there, so we need to make sure that those experiences are built into our generations from very early on.”
Expensive lab equipment and intricate instructions are not required to spark a light-bulb moment. In fact, hands-on experimentation can begin before students even return to the classroom.
Boudonck suggests turning to common household substances, such as vinegar, milk and baking soda, to create an at-home science lab with plenty of wow factor.
Test out Boudonck’s experiments and you won’t burn the house down, but you just might ignite a passion for science.
Editor’s note: Experiments suitable for ages 5 and up, with parental supervision.
 Milk Magic
Materials:
1 cup milk
4 teaspoons white vinegar
Small pot
A strainer
Procedure:
- Pour the milk into the pot. Heat the milk until it is warm. Turn off the heat.
- Slowly stir in four teaspoons of vinegar until the milk becomes rubbery.
- Pour the rubbery milk through the strainer into the sink. Careful, it may be hot
- (you may also let it cool first).
- Left in the strainer is a mass of lumpy blobs. Mold into any shape and let dry.
- Now you have your own plastic!
What This Means:
Many plastics are made from petroleum oil or crude oil, which contain organic (carbon-containing) substances. In this project, the vinegar (an acid) reacts with the casein in milk (an organic substance), creating the plastic. In practice, this type of “milk” plastic is much too expensive for household use.
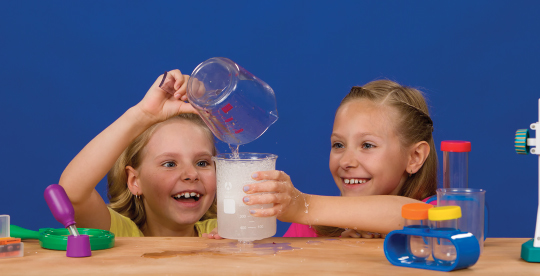
Dancing Craisins
Materials:
Baking soda
Vinegar
Craisins (dried cranberries)
Measuring cup
Procedure:
- Cut off the top of the 2-liter plastic bottle.
- Pour 1 1/2 cups water into the plastic bottle.
- Add 1 heaping teaspoon of baking soda and stir until it is dissolved in the water.
- Add 4 to 6 Craisins to the water/baking soda mix in the plastic bottle.
- SLOWLY add one cup of vinegar into the plastic bottle.
- After a couple of minutes, what happens to the Craisins?
You may also try this with raisins and lentils. And you may substitute the water, baking soda and vinegar combination with tonic water.
What This Means:
In the plastic bottle, a base (baking soda) and an acid (vinegar) react to form a gas (carbon dioxide). As the gas forms, it adheres to the Craisins in the bottle. Once enough gas adheres to a Craisin, it will begin to rise to the surface. When it reaches the surface the gas escapes into the air and the Craisin sinks. The Craisin repeats this process for several hours or until it gets soggy and too heavy to rise to the surface.
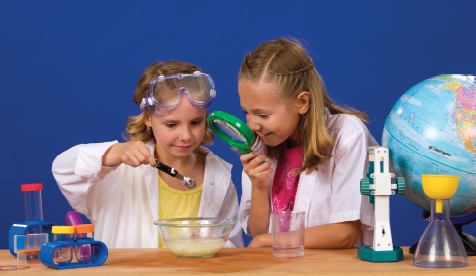
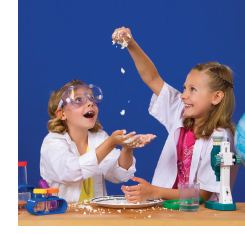
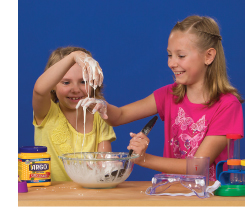 Strange-Acting Goop
Materials:
Cornstarch
Large bowl
Water
Mixing spoon
Procedure:
- Put 1 cup of cornstarch into
- the bowl.
- Add 1⁄2 cup of water. You may also add some food coloring.
- Mix well.
- Slowly dip your finger into the gooey mixture. Grab some in your hand and pour it back into the bowl. Now, try slapping it hard with your hand or a heavy spoon. What happens? Next, grab some in your hands again and squeeze. What happens now?
What This Means:
The strange-acting goop allows us to learn about molecules. A molecule is one of the basic units of matter. It is the smallest particle into which a substance can be divided and still have the chemical identity of the original substance. When slapped quickly, the strange-acting goop molecules are all tangled up and prevent any splattering. In this way the mixture behaves more like a solid. When you slowly squeeze the mixture in your hand, the goop feels more like a solid inside your hand, yet it slides out through your fingers back into the bowl. That’s because the mixture now behaves more like a liquid.
Special thanks to readers Sophia and Brianna Veres for modeling, and to Stone's Education Superstore for science equipment, stones-education.com. .